1 - Introduction
The objective of this assignment is to familiarize yourself with the Linux kernel source code. Specifically, you will:
- Compile your own Linux kernel.
- Create your own kernel module.
- Add a new kernel system call and then test this system call from a user-space program.
All the assignment’s steps must be performed using your Debian virtual machine from PA 1. The notions from the course involved in this assignment are the following:
- Linux source code exploration and compilation.
- Installing and running a modified kernel, as well as creating and testing a module.
- The
printkkernel function. - User space/kernel space communication using a system call.
Remember to read the instructions carefully before following them, as some actions are time-sensitive.
2 - Find and Boot Your “Known Good” Kernel
Start the Debian VM, log in, open a terminal window. Execute the following command to find the exact version of the kernel you are currently running: uname -r
Write down the result somewhere and remember this exact kernel version for the rest of the semester. This is your “known good” kernel which is known to work correctly. Also execute ls -l /boot and you should see one “vmlinuz” file in the /boot directory that has the exact same version in its name. This is the file containing your “known good” kernel. Never delete or modify this file in any way.
Use Debian’s battery icon menu (upper right corner of the Debian desktop) to restart the virtual machine. As soon as you see the white-on-blue-green menu of the GRUB boot loader, press the down arrow key on the keyboard to select the second menu entry named “Advanced options for Debian GNU/Linux”. You have only 5 seconds to do this! Then press Enter to get a sub-menu. In the sub-menu, select the “known good” kernel, based on the version you learned just above (but not the “recovery mode” one, which is similar to Microsoft Windows’s “safe mode”, which is not what we want here) and press Enter to boot this ‘known good“ kernel. From now on this is what you will do every time you boot or reboot the VM, to make sure you always know exactly which kernel you are booting! If later you have a problem when testing your own modified “working” kernel (see below), such as a kernel that panics (crashes) on boot, you will always be able to boot this “known good” kernel instead to get back to work.
3 - Build Your “Working” Kernel
3.1 - Prerequisites
-
Before compiling your own “working” kernel, you must first install some tools and the Linux kernel source code. So, after booting the “known good” kernel (as indicated above), log in, open a terminal window, and execute the following command to install all the software required to configure and compile the Linux kernel source code:
sudo apt install build-essential pahole libelf-dev libncurses-dev libssl-dev flex bison- build-essential is a software package that depends on all the development libraries and header files and basic development tools that you need, so installing it guarantees that all those things are present on your VM.
- pahole and libelf-dev are a set of tools and a library to handle Executable and Linkable Format (ELF) files.
-
libncurses-dev is a library to create text-based user interfaces, which is used by
make menuconfigbelow. - libssl-dev is a library that provides cryptographic functions and secure networking.
- flex is a lexer/scanner generator.
- bison is a parser generator.
-
Install the Linux kernel source code:
Execute
sudo apt install linux-sourceThis automatically selects the right version of the Linux kernel source code, based on the version of the “known good” kernel which is currently executing on your VM.-
Execute
ls -l /usr/srcand you should see one file namedlinux-source-X.Y.tar.xz.taris the standard file archive format for Unix, andxzis one among many compressed file formats on Unix (other common ones aregzandbz2). Together,tarandxzgive you a compressed file archive, similar in spirit to thezipcompressed file archive format which is used a lot on Microsoft Windows. Execute
cd ~to make sure that you are in your home directory.-
Decompress and extract the kernel source code you just installed:
tar -xavf /usr/src/linux-source-X.Y.tar.xz-
-xmeans “extract”. -
-ameans “auto-compress” or “auto-decompress” depending on context. -
-vmeans “verbose”, to see the names of the extracted files as the extraction happens -
-fspecifies the name of the compressed archive file.
After doing this, you should have in your home directory a new directory named
linux-source-X.Y. Uselsto see it. -
Use
du -s -h linux-source-X.Yto see how big the Linux kernel source code is.-
Change the name of this new
linux-source-X.Ydirectory:mv
linux-source-X.Y pa2 Execute
cd pa2to move into the top directory of your Linux kernel source code. Uselsto have a look at the different directories there.
3.2 - Build Configuration
-
Create the configuration file for the kernel:
-
For simplicity, we will copy then modify the configuration file for the “known good” kernel which is currently executing on your VM:
cp /boot/config-$(uname -r) .configAgain, the command
uname -rtells you exactly which kernel version you are currently executing on the VM, so we can use the result of this command to copy the right kernel configuration file from the/bootdirectory into the current directory containing your Linux kernel source code. Execute
make menuconfigto modify this configuration file. You should then get a text-based user interface which allows you to easily modify your kernel configuration file.Press
Enterto go into the “General setup” sub-menu, press the down arrow twice on your keyboard to go down two lines, thenEnterto select “Local version - append to kernel release”. In the new text window that appears, enter a minus sign-followed by your login name (which is also your Stevens login name), followed by-pa2. For example:-rtsang1-pa2(replace my login name with yours, obviously). Do not add any space before, inside, or after this text. This piece of text is going to be added to the version of the Linux kernel you are going to compile, so that later you can easily recognize which kernel is yours. This will be your “working” kernel. PressEnterto select “OK” and you should be back in the previous sub-menu, with the text you just typed is now showing between()parentheses in front of the name of the “Local version - append to kernel release” sub-menu. Press the right arrow on your keyboard to select “Exit” and thenEnterto go back to the previous top-level menu.Select Save and press
Enter. In the new window, check that the default “.config” file name is correct and pressEnterto save your new configuration file. Then select “Exit” to quit the “menuconfig” user interface and go back to the usual Unix shell.-
Double check the differences between the original kernel configuration file and the one you just modified:
diff /boot/config-$(uname -r) .configIn the output you should see that the kernel variable
CONFIG_LOCALVERSIONis now defined to be the piece of text-rtsang1-pa2(except with your own login name) while before it was the empty string (ignore any change forCONFIG_CC_VERSION_TEXTand for SALT, SIG, and KEY stuff, these changes are irrelevant). You are now ready to compile the Linux kernel source code for your “working” kernel!
-
3.3 - Compilation
-
Execute
nprocto see how many processors your VM is using (this should be the same number you indicated in the settings of the VM in VirtualBox or UTM).You might also want to go into the settings of your host operating system (Microsoft Windows or Apple macOS) and make sure that the power settings of your computer are set for maximum performance (for example, in Microsoft Windows, click on the battery icon at the right end of the bottom taskbar, then move the slider to “Best performance”); you can undo this setting later again after you are finished compiling the kernel.
Also make sure that your host OS is not set up to automatically suspend or shut down your host computer if you do not move the mouse or whatnot for a while. Again you can undo this later when you are finished compiling the kernel.
If you are using a laptop computer, also make sure that it is plugged into an electric socket, otherwise your host OS might automatically throttle your computer’s performance to save the battery.
Ensure that Debian does not suspend itself while you are in the middle of compiling your kernel. Click with your right mouse button on the Debian desktop background, select “Settings”, then “Power”, then click on “Automatic suspend” and turn off both “On Battery Power” and “Plugged In”.
-
Now we are ready to compile the whole Linux kernel source code using all the VM’s processors in parallel, to speed up things:
make -j $(nproc) allWait an hour or two (or more). You will know the compilation is over when your computer’s fan stops making more noise than usual… If for some reason you need to stop the compilation before it is finished, just press
Ctrl-con the keyboard. You can then re-start the compilation later using the same command again, and it will automatically restart from where it left off.If for some reason the compilation fails, it might be hard to see why it failed because you are compiling different parts of the kernel code in parallel. In that case, you can execute just
make allto restart the compilation from where it failed but this time in sequential mode on a single CPU, which will make it much easier to see what the problem is. Then contact your nearest Course Assistant.If you look at the output of the
makecommand while it is compiling the code, you will see different abbreviations:-
CCis when compiling a C file to get a.oobject file (a file containing binary CPU instructions) -
LDis when linking (gluing) multiple object files together -
ARis when creating a library (a.aarchive file of object files, which later will be linked with the rest of the kernel) -
[M]means that this code is part of a dynamically loadable kernel module, not part of the monolithic Linux kernel proper.
-
Execute
du -s -h .to see how much disk space the current directory containing the whole compiled Linux source code takes (it should be around 23 GB).
3.4 - Install and Boot
-
When compiling the kernel, all the kernel modules are also compiled at the same time. We now need to install these new kernel modules:
sudo make INSTALL_MOD_STRIP=1 modules_installThis can take a little while, and must be done as root (the system administrator) hence the use of
sudohere.The
INSTALL_MOD_STRIP=1argument given to themakecommand tellsmaketo strip extra debugging information from the modules when installing them, which saves around 2GB of disk space. -
Once the modules are installed, you can execute
ls -l /usr/lib/modulesand you should see in the output a directory with a name that has your login name andpa2at the end, which is where the modules were installed.The command
du -s -h /usr/lib/modules/*should show you that all the different directories there (the one for your own modules, as well as the one for the “known good” kernel) are about 400MB in size. -
Now we can install the new “working” kernel itself:
sudo make installDo not worry about any “Please install the Linux kernel “header” files matching the current kernel” message in the command’s output; we would need this only if we were to try to use our Debian VM as the host for another VM on top of it!
-
Execute
ls -l /bootand you will see thatmakeinstalled several files there, all of which have your login name and “pa2” at the end of their name:config-X.Y…-rtsang1-pa2: a copy of the.configfile you used for compiling your kernel (you can check this using thediffcommand, for example; see above)initrd.img-X.Y…-rtsang1-pa2: the kernel’s “initial RAM disk” which the kernel only uses at boot time (see here for more information if you are curious)System.map-X.Y…-rtsang1-pa2: a list of your kernel’s symbols (the function names and variable names inside the kernel)vmlinuz-X.Y…-rtsang1-pa2: your very own “working” kernel!
As part of the kernel’s installation, the configuration file for the GRUB bootloader is also automatically updated so that the bootloader now knows about your new kernel.
READ FIRST: Use Debian’s battery icon menu to restart the virtual machine. As soon as you see the white-on-blue-green menu of the GRUB boot loader, press the down arrow key on the keyboard to select the second menu entry named “Advanced options for Debian GNU/Linux”. You have only 5 seconds to do this! Then press
Enterto get a sub-menu. In the sub-menu, select now your own “working” kernel, which has your login name and “pa2” at the end of its name (but again not the “recovery mode” one) and pressEnterto boot your own kernel. Happiness ensues.
3.5 - Deliverables
-
After booting your own “working” kernel, log in, open a terminal window, use
Ctrl-+to increase the font size of the terminal window, and executeuname -a(which should show a kernel name with your own login name and “pa2” at the end of it) and thenid. Take a screenshot and save it as a picture somewhere on your host computer, you will need to submit it later on Canvas (more details about this at the end of this document). Make sure the kernel version and your login name (Stevens login name) are clearly visible inside the terminal window in your screenshot. For example: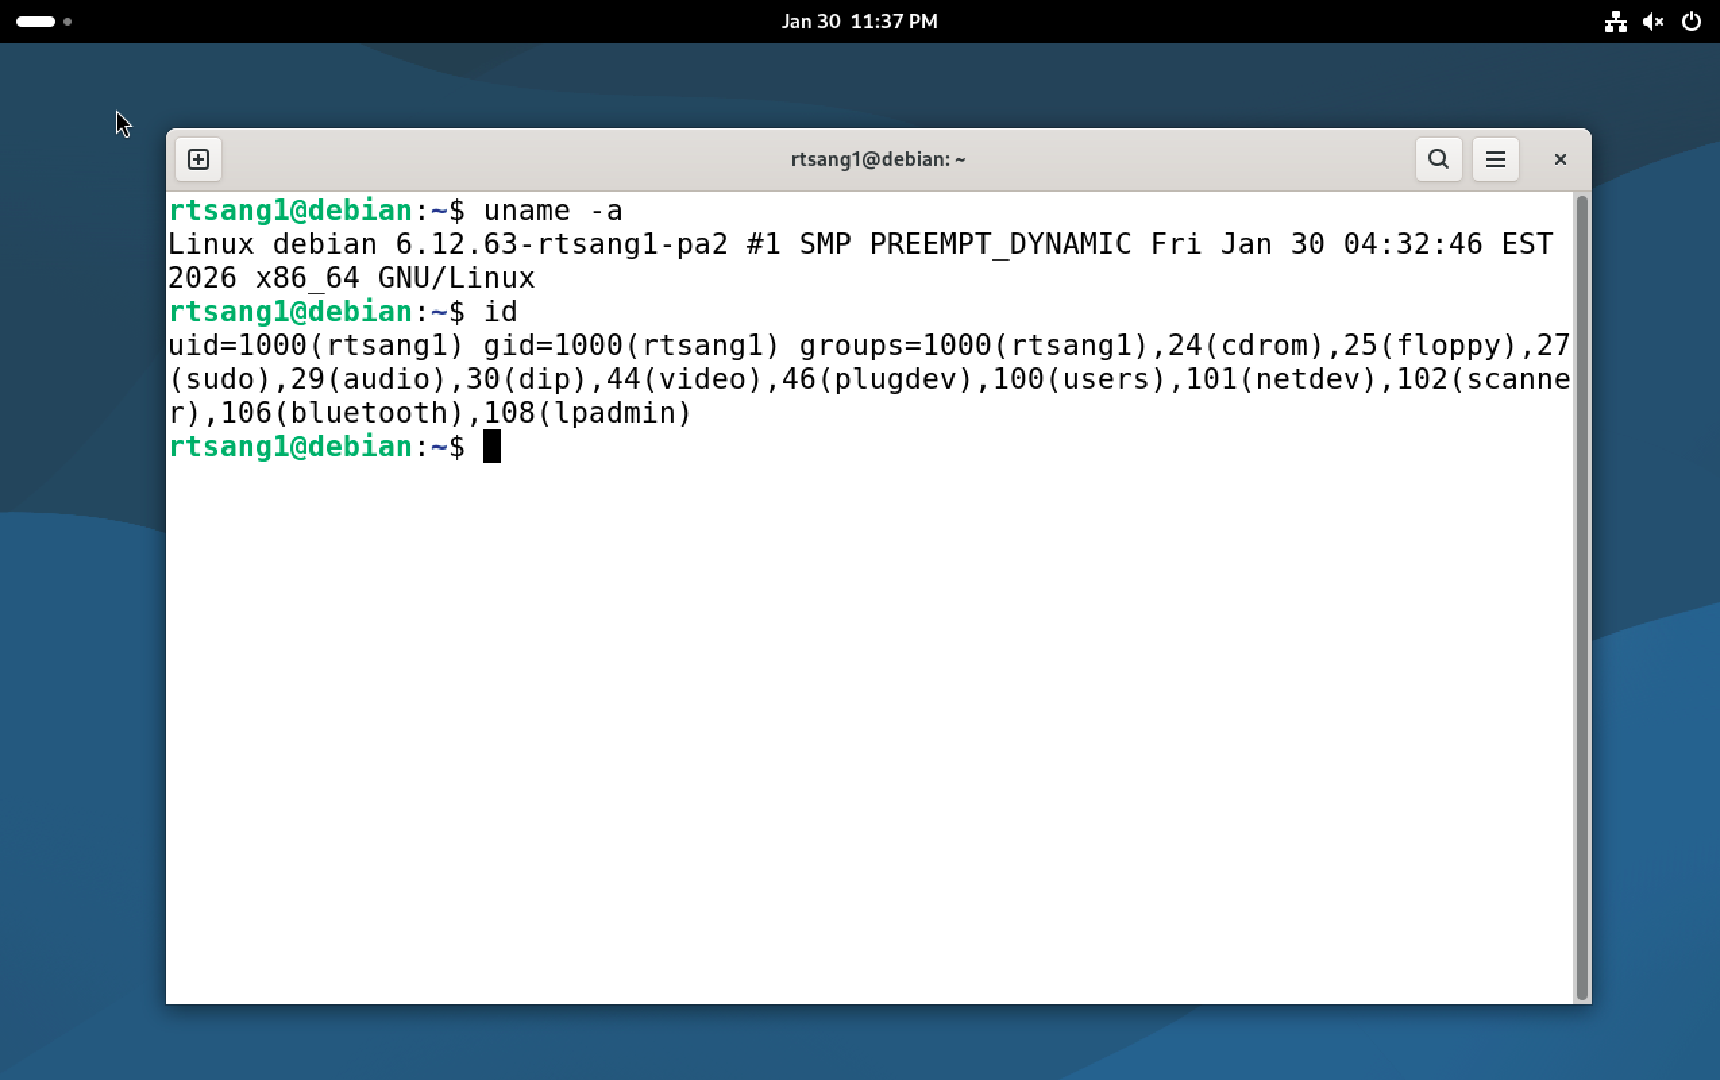
Congratulations on compiling and booting your first Linux kernel!
Now create in your home directory another new directory that you will use for submitting your assignment (again, use your own Stevens login name):
cd; mkdir rtsang1-pa2Then copy your “working” kernel configuration file into your submission directory:
cp pa2/.config rtsang1-pa23.6 - Backup
To finish this part of the assignment, create a backup copy of the kernel source code you just compiled, just in case.
There are 2 options:
-
(Long) Do a recursive copy:
cp -p -r pa2 pa2-backup-
-rmeans to do a recursive copy that will automatically copy the directory and all of its subdirectories -
-ppreserves the file timestamps when copying. GNU Make uses timestamps to determine if a file needs to be recompiled, and preserving the timestamp will prevent it from being recompiled unnecessarily.
-
(Longer) Create a compressed archive:
tar -cJvf pa2-backup.tar.xz pa2/
The recursive copy is slightly faster, but will take up more disk space on the VM (23 GB at time of writing). Using tar will take longer due to compression, but will take up much less space (2.9 GB at time of writing).
Later, when doing the rest of this assignment, if you make a big mistake inside your “pa2” directory, such as accidentally deleting some files, you can restore them from your backup. (tar can extract single files from an archived directory)
In the worst case, if you do not know how to fix the mistake, you can always completely delete your “pa2” directory (cd ~; rm -rf pa2) and re-create it using the backup copy (cp -p -r pa2-backup pa2 or tar -xJvf pa2-backup.tar.xz).
4 - Custom Kernel Module
-
In your submission directory (
cd rtsang1-pa2), create a new directory (mkdir module). In that new directory (cd module), write a Linux kernel module in a file namedLOGIN.c(likertsang1.cbut use your own login name).This module must have a
printk()statement that outputs “Hello World from NAME (LOGIN)” in the kernel log when the module is loaded into the kernel, where NAME is your full legal name and LOGIN is your Stevens login name.-
When the kernel module is unloaded it must print “PID is XYZ and program name is NAME” where XYZ is the PID number and NAME is the program name of the current process.
Linux stores process information in structures called “tasks” (defined here).
You can use the
currentmacro inasm-generic/current.hto access the task struct for the current process.
Compile your kernel module using the appropriate
Makefile. (Make sure that you are still running your own “working” kernel when doing this!)
4.1 - Deliverables
-
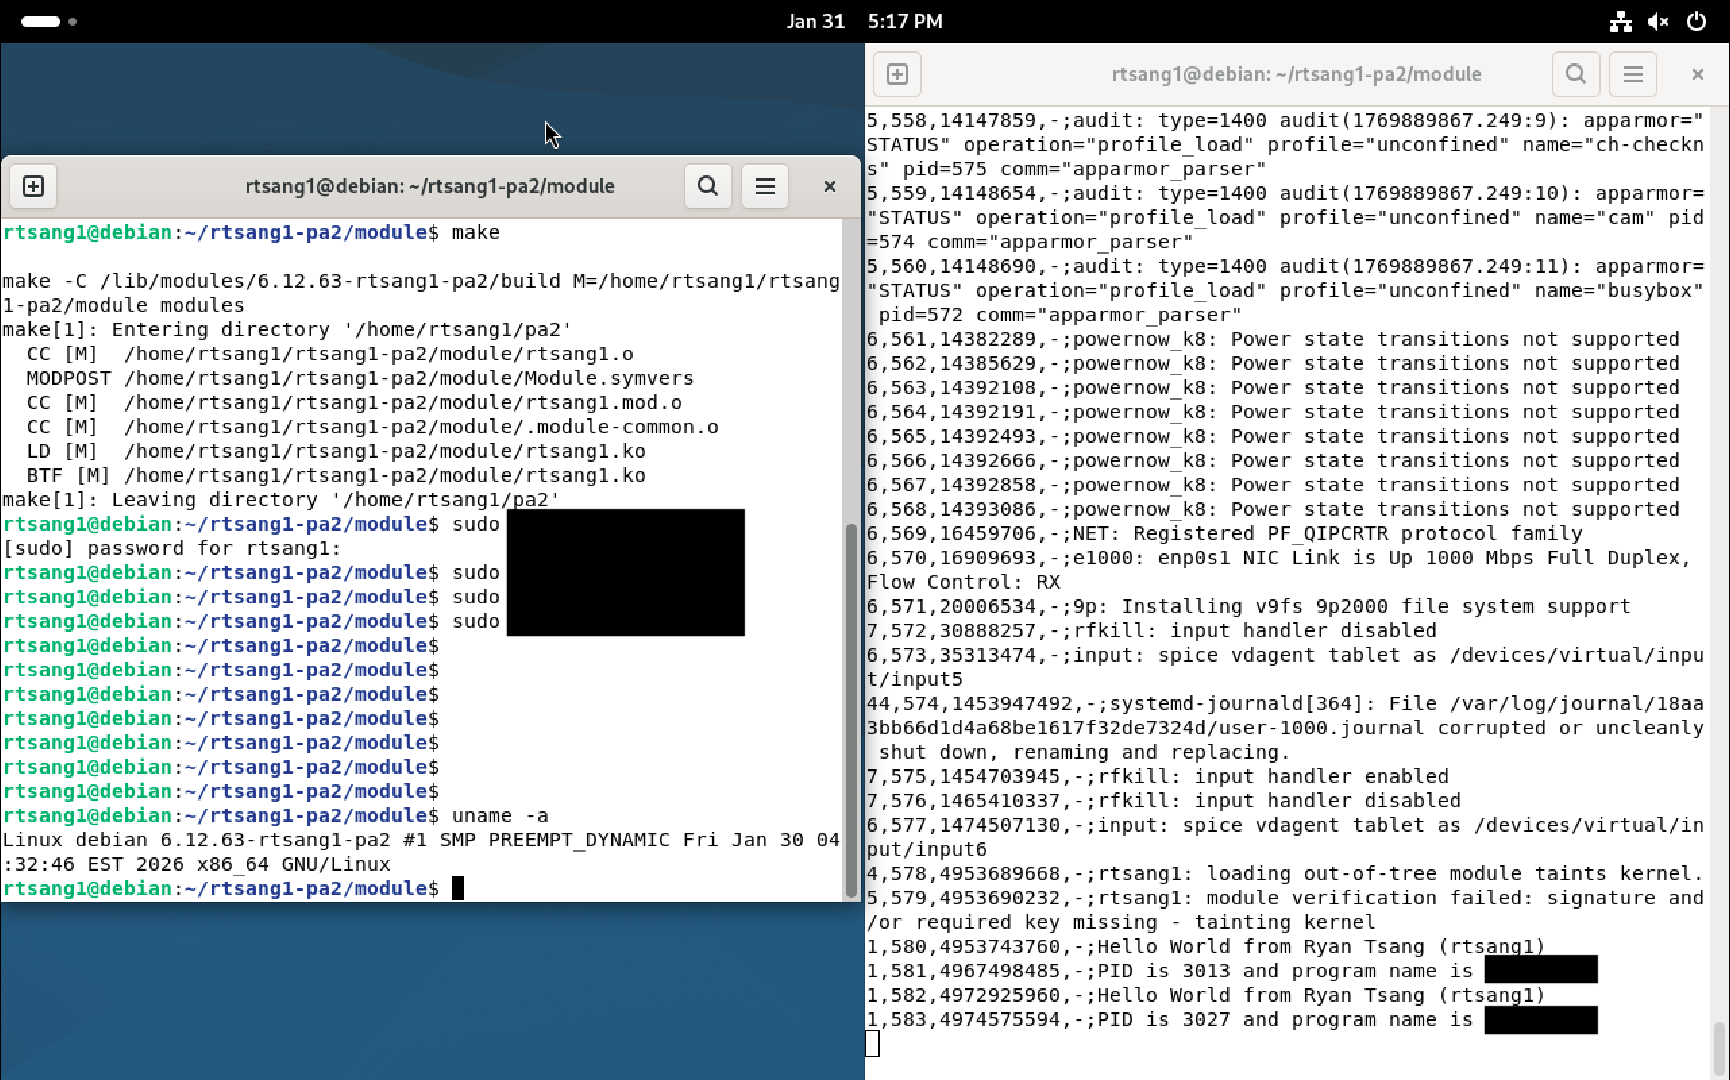
You must provide a single screenshot that shows two Debian terminal windows side by side:
- One window must show the kernel log (with your module’s output visible in it)
- The other window must show the output of the
uname -acommand followed by commands to load-unload your module at least twice (so we can see in the kernel log that the PID printed when unloading the module changes during each unload).
-
Save the screenshot somewhere on your host computer, you will need to submit it later on Canvas (more details about this at the end of this document). For example (partly censored):
5 - Custom System Call
5.1 - Adding The System Call
-
In the directory containing the compiled source code of your “working” kernel create a new directory.
cd ~/pa2  # `~` is your home directory
mkdir my_syscall -
In that new directory, in a file named
my_syscall.c, write the C code for a new system call namedLOGIN_syscall(replaceLOGINwith your Stevens login name) that takes as single parameter a pointer to a character array containing a string.Make sure you use the proper C macro to define your system call (see
linux/syscalls.hand thegettimeofdaysyscall for an example).The code of your system call must always return a signed long integer (
long) as result.Your system call should do the following:
If the string pointer given as argument is NULL then your system call must immediately return
-1.If the string length is larger than 32 (where the string length is its total number of characters, including the
\0string terminator character), then your system call must immediately return-1.Copy the string from user space to kernel space.
Use
printkto print “before: “ followed by the string. Note: whenever you useprintk, always make sure that the string you want to print is terminated with a\nnewline character, otherwise the string will not immediately appear in the kernel logs when your code is executed.Replace all occurrences of a lowercase vowel letter (a, e, i, o, u) in the string with the first letter of your login name, in uppercase (for example, given my
rtsang1login name, the letters a, e, i, o, and u are all replaced with the uppercase letter R).Use
printkto printafter:followed by the modified string.Copy the modified string from kernel space to user space.
The system call then returns as result the number of character replacements performed in step 5.
In your code, make use of the following kernel functions from
include/linux/uaccess.hand as much as possible:Function Description get_usergets a simple variable from user space put_userputs a simple variable to user space clear_userclears, or zeros, a block in user space copy_to_usercopies a block of data from the kernel to user space copy_from_usercopies a block of data from the user space to the kernel strnlen_usergets the size of a string buffer in user space strncpy_from_usercopies a string from user space into the kernel IBM has archived documentation that may prove useful.
If any of the above functions fail, return
-EFAULT.Make sure your code properly checks for errors when using each of these functions (refer to the syscalls used in https://elixir.bootlin.com/linux/latest/source/kernel/time/time.c#L140).
Do not use a module to implement your system call.
-
Modify other files in the Linux kernel source code as necessary:
arch/x86/entry/syscalls/syscall_64.tbl: Add your syscall to the syscall table. (Use tabs, not spaces between fields)include/linux/syscalls.h: Add your syscall prototype to the header file.-
my_syscall/Makefile: Add your syscall to the build system. This file should only contain:obj-y += my_syscall.o -
Makefile: Update the build system to build your syscall. Make the following modification:core-y := my_syscall/
Give your system call the the last number in the syscall table +1 (463 at time of writing).
Keep a list somewhere of all the files you modify, because later you will need to copy them to your submission directory.
-
Recompile your “working” kernel, the same way you did it in Section 3.3.
Some of the files you need to modify are referenced throughout the kernel’s code, so, when recompiling, the
makecommand then needs to recompile most of the kernel code again, which again takes a very long time.So make sure you modify the files correctly on the first try, so you do not have to recompile the whole kernel over and over.
If you only need to change your
my_syscall/my_syscall.cfile then recompiling the kernel should take only about 5 minutes since the rest of the kernel’s code will not need to be recompiled again in this case. -
Reinstall your “working” kernel and its associated modules if and only if compilation succeeded. See Section 3.4.
When installing your modified “working” kernel, the previous version of your “working” kernel will be renamed with an extra “.old” extension at the end of its name. You can just ignore this one.
-
Reboot the virtual machine and make sure that you use the GRUB bootloader to select the correct kernel when rebooting (your “working” kernel with the “-rtsang1-pa2” name, that now contains the code for your own system call).
- If your “working” kernel panics (crashes) on boot for some reason, reboot the VM using your “known good” kernel and fix the problem in the code of your “working” kernel.
-
After you have booted the correct kernel, do the following to double-check that the kernel you are now running actually knows about your system call:
-
Ensure your syscall symbol is in the
System.map:grep rtsang1_syscall /boot/System.map-*-pa2(using your login instead of mine of course)
You should get a dozen different names related to your system call in the output of the command.
-
Ensure your syscall symbol is in
/proc/kallsyms:grep rtsang1_syscall /proc/kallsymsYou should see the same output as above.
If the output the above commands is empty, then the kernel that you are currently running does not know about your system call, which means that either you booted the wrong kernel or you did something wrong somewhere. Re-read this whole section and try again.
-
5.2 - Testing The System Call
In your submission directory (cd ~/rtsang1-pa2), write the C code for a user-space test program called syscall.c that invokes your system call.
Since your system call does not have a corresponding C wrapper function available in the C standard library, you must directly use the syscall function of the C standard library to call your system call (see OS concepts lecture notes for an example).
Your code must invoke your system call twice:
- once for the case where the string size is larger than 32.
- once for the case where the string size is less than 32.
In both cases, your C program must print on the screen:
- The string given to the syscall, before the system call happens.
- The return value of the syscall.
- The string after the system call, even if it has not been modified.
You can directly use the system call number 463 in your C code.
The strings that you use in your code must be defined as local variables (the same way it is done for example on slide 19 of the “OS Concepts and Structure” lecture notes), not as string constants that you directly give to the system call as argument.
This is because, when your code executes inside a process, all the string constants from your code are stored in a part of the “data” segment of the process’s address space which is read-only (since string constants are… constant), which in turn means that your kernel system call would fail when trying to modify those strings.
Local variables are stored in the process’s stack, which is read-write and your system call will then be able to modify those strings.
5.3 - Deliverables
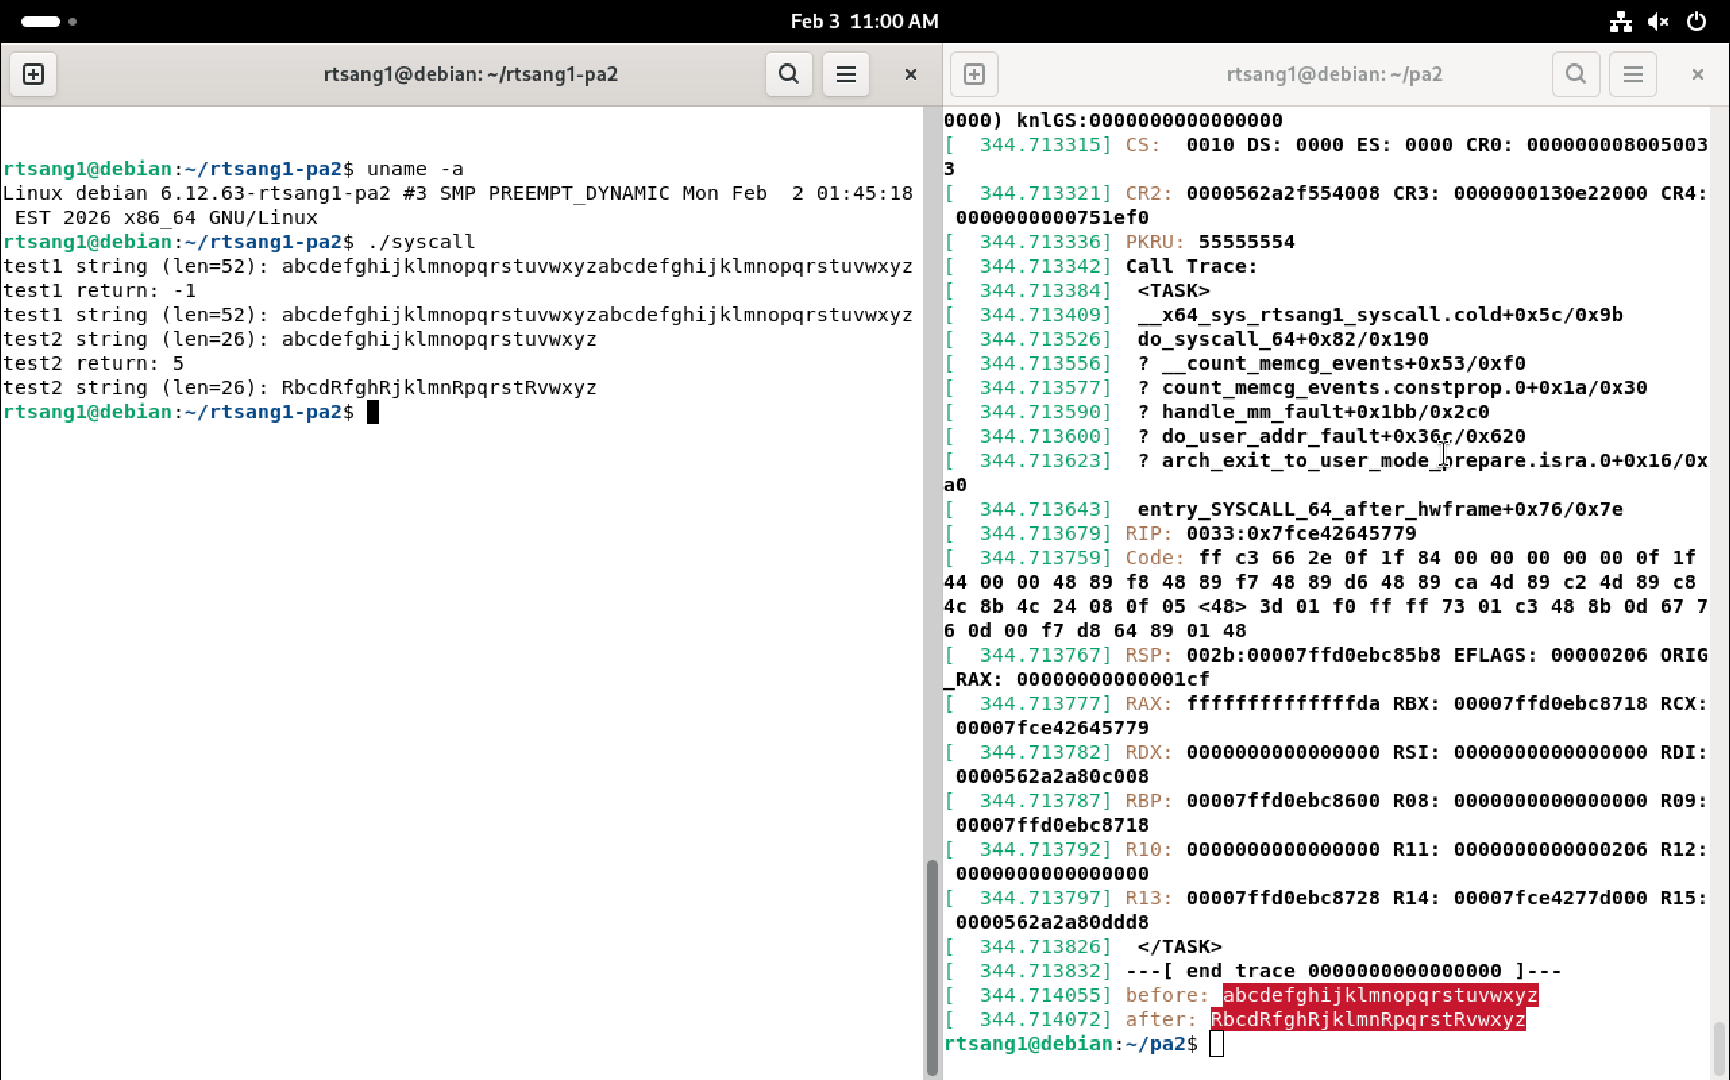
You must provide a single screenshot that shows two Debian terminal windows side by side:
- one window must show the kernel log (with your system call’s output visible in it, when the string given as argument to the system call is short enough)
- the other window must show the output of the
uname -acommand followed by the execution of your user-space test program.
Save the screenshot somewhere on your host computer, you will need to submit it later on Gradescope (more details about this below). For example:
6 - Submission
- Once both your system call and your user-space test program work, copy the code of the system call, plus any other kernel file you modified, into your submission directory (your user-space test program must already be there):
cd ~/pa2; cp -p -r my_syscall <any other file you modified> ~/rtsang1-pa2-
In your submission directory, create a file named
login.txtthat contains your Stevens login ID:cd ~/rtsang1-pa2
echo "rtsang1" > login.txtThe autograder uses this to confirm you have submitted all necessary files. You must include this file or you will fail the autograder!
-
In your submission directory, create a PDF file named
screenshots.pdfthat contains:- Your full name.
- The Stevens Honor pledge.
-
The three screenshots you created above:
- one showing that you compiled your own “working” kernel (Section 3)
- one showing how your kernel module works (Section 4)
- one showing how your system call and your user-space test program work (Section 5)
Make sure the screenshots are clearly readable.
Also add a short explanation before each screenshot so the Course Assistants know what you are trying to show on those screenshots.
At this point the submission directory (
rtsang1-pa2) must contain all the files you have created or modified during this assignment (including the kernel.configconfiguration file, which you can only see in the submission directory by using thels -acommand).If you install the
treeutility program and run the commandtree -a rtsang1-pa2, you should see the following structure:rtsang1-pa2
├── .config
├── login.txt
├── module
│ ├── Makefile
│ └── rtsang1.c
├── my_syscall
│ ├── Makefile
│ └── my_syscall.c
├── <other files>
└── syscall.c -
Install the zip program on your virtual machine (
sudo apt install zip) and then create a ZIP file of your submission directory:cd; zip -r rtsang1-pa2.zip rtsang1-pa2The
-rflag means to zip all the subdirectories recursively: do not forget it!Remember to use your own login name instead of mine.
Once you have correctly created the file
rtsang1-pa2.zip, copy it to the host OS using your shared folder, double-check its content to make sure it contains everything (see Section 7).Submit your submission zip file on Gradescope and confirm autograder sanity checks pass. Solutions will be graded manually. Autograder tests are not exhaustive.
After the deadline for this assignment has passed, you can delete the backup copy of your “working” kernel:
rm -rf ~/pa2-backupIt is up to you whether you delete the compiled source code of your “working” kernel or not (
rm -rf ~/pa2), you will not need it anymore this semester. You can delete it after the deadline for this assignment has passed, if you want to save VM disk space, or delete it only at the end of the semester, or keep it for ever as a souvenir!
7 - Rubric
| Percentage | Item |
| 5% | Correct .config file |
| 5% | Screenshot showing the corresponding “working” kernel version |
| 15% | Code of module/rtsang1.c (with your login name) |
| 5% | Code of module/Makefile
|
| 10% | Screenshot of kernel log with module loading-unloading (twice) |
| 25% | Code of my_syscall/my_syscall.c
|
| 5% | Code of my_syscall/Makefile
|
| 15% | Code of syscall.c
|
| 5% | Other modified kernel files |
| 10% | Screenshot of kernel log and output of syscall.c
|
You do not get points for screenshots unless the corresponding files are submitted too.
So for example you will not get points for the first screenshot listed above if you do not also provide the corresponding
.configfile.Screenshots alone will not get you any points at all, so make sure you double check everything before you submit on Gradescope!